
Casada Shower Floor Drain Installation Guide Simplify Your Bathroom Upgrade
Upgrading your bathroom? The casada shower floor drain installation is critical to install when seeking proper drainage and boosting the showering area’s functionality and appearance. This guide provides basic steps in the installation of a Casada shower floor drain, which can be followed by both amateurs and professionals. If all necessary steps are taken and discussed with the right tools, then installation can be carried out to perfection for years. Now, let’s discuss the points of process, instruments needed, and some advice from professionals to make such a project uncomplicated and effective.
Why Choose a Casada Shower Floor Drain?

Casada shower floor drains are also characterized by classy designs, and they work efficiently. They also offer proper drainage of water to prevent water accumulation and any resultant damages to the floor of your bathroom. Such drains are for the modern showers and perfectly harmonize with minimalist and contemporary design. Also, they are manufactured from high-quality and long-lasting material, such as stainless steel, making them of high standing and not easily corroded. Selecting a Casada drain means easy cleaning and enhancing the value of your bathroom, which makes it the ideal choice for any remodeling.
Tools and Materials Needed for Installation

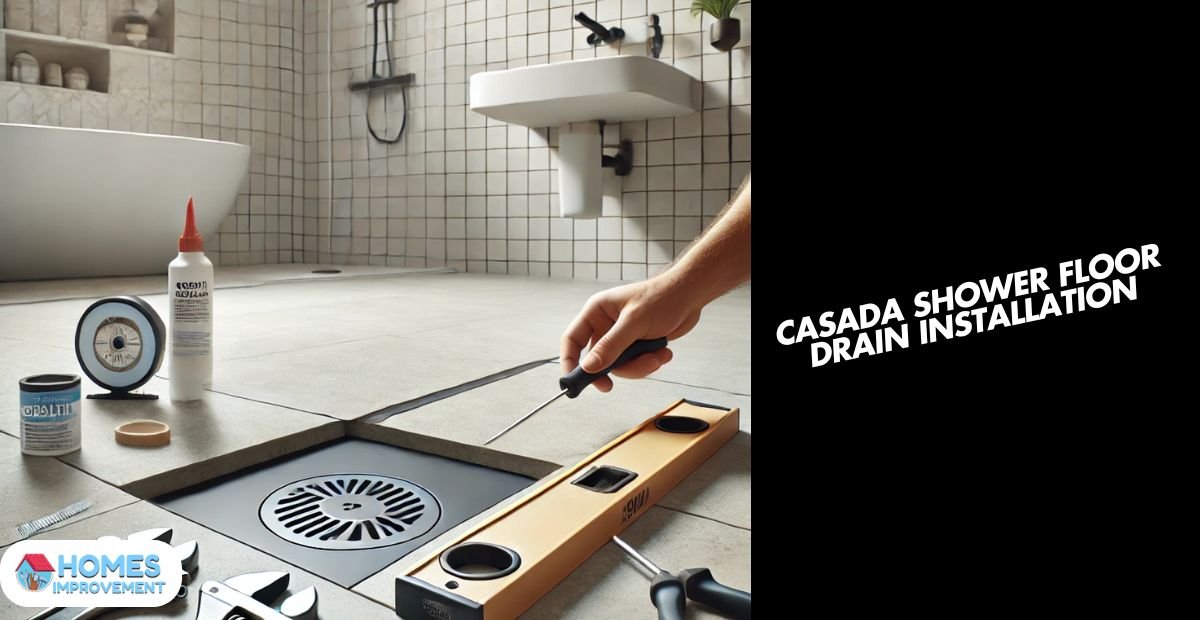
When preparing to install the shower’s floor drain at the Casada, ensure that you have assembled the necessary tools and materials. The common tools on site are a screwdriver, plumbing tape, a PVC pipe cutter, a level, and a waterproof membrane. Also, it would be advisable to apply tetra PVC glue and sealant so that the drain may properly fit to the pipe system. That way, having all tools ready would be much more helpful since the process would go on without much hitch. Preparation also reduces errors and leads to a professional finish on the skin.
Prepare the Shower Floor
The first process of installing a Casada shower floor drain is followed by the preparation of the shower floor. You must also clear the existing tile, drains, or other waste matter to achieve a flat surface. Consider the stability of the subfloor and check for weaknesses or cracks on the floor base itself. A waterproof membrane should be used to prevent water from frying the structures behind it. This step is necessary so that there will be no leakage, and this will be good for the shower floor to be long-lasting.
Position the Drain
The next step is to locate the Casada shower floor drain according to the desired place of installation. It is more commonly mounted either centrally or not quite centrally to the shower arrangement. They include: To ensure the drain is correctly placed, you should use a level to check on that aspect, as it’s a critical step when inserting the drain as you determine the best path through which water is likely to flow. The next step involves marking the area where the drain opening is to be made and also ensuring that measurements have not shifted so as to cause wrong positioning. The rest is plain sailing when done right, and the drainage system is seamless.
Connect the Drain to the Plumbing
Some of the important steps that must be followed are the linking of the drain to the plumbing system as a part of the Casada shower floor drain installation. You have to then connect the drain with the existing pipe either with PVC glue or by a fitting system. Make sure there are no joints or pin connections to give way and leak under pressure. As an extra measure, use plumbing tape on all suspected threaded connections to reduce chances of leakage. First, you should try tightening up the connection with water to confirm any issues such as leakage before moving to the next stage.
Install the Drain Body
After plumbing with the drain, fit the drain body into place firmly enough. Navigate it into the hole that has been made, making certain that it is well fixed. If the drain is designed with an odd contour, then you should require screws and clamps in order to ensure its stability. Next, apply sealant around the edges to ensure the watertightness of some of the walls that are below ground level. This last step makes sure that the drain will still be securely fixed to the ground despite being used several times in the day.
Apply a Mortar Bed and Waterproof Layer
When laying the drain body into the structure, apply a mortar bed around the drain body for ease of tiling. The mortar bed should also be constructed as sloping towards the drain in order to improve the flow of water. It is recommended that you apply a layer of moisture barrier to the whole area so that water cannot penetrate through the subfloor. Its main function is to act as a barrier over the structure, which gives a strong and steady base for the shower floor.
Tile the Shower Floor
Tiling is the last step for which the Casada shower floor drain is installed. Place the tiles onto the floor around the drain carefully so that they are level and well spaced. Trim the tiles to size the drain opening so that they create a neat and clean situation on the bathroom floor. Make use of waterproof grout in the process; it will increase the durability of the floor in case of water contact. This is why you should wait until the grout has hardened before checking the drain.
Tips for a Flawless Installation
While it may look like it can be quite a difficult task to install a Casada shower floor drain, planning and diligence play a critical role in making the process much easier. Begin with choosing appropriate drain size and type in relation to the shower design that you want to have. Each drain will look different, so make sure to have your installation match the manufacturer’s recommendations. Choose better equipment to guarantee the correctness of the cut and customization of the plastics. Leak tests should be done at each step of connection, and problems realized should be solved to avoid complications later.
Finally, ensure that you make the area waterproof correctly by using the right membranes and sealants. Good shower waterproofing helps eliminate any possibility of water damage in the bathroom and makes the shower the greatest for usage. Following the outlined tips will help you get a professional installation that will ensure optimal functionality and style when doing the bathroom.
Common Mistakes to Avoid
While installing a Casada shower floor drain, avoid common mistakes such as improper alignment or inadequate waterproofing. Ensure the drain is correctly positioned and securely connected to the plumbing system. Skipping the mortar bed or waterproof layer can lead to long-term issues like water leakage or structural damage. Additionally, take the time to cut tiles accurately to maintain a clean and professional finish.
Conclusion
The Casada shower floor drain installation process may require effort and precision, but the results are well worth it. A well-installed drain enhances the functionality, durability, and aesthetic appeal of your shower. By following the steps outlined in this guide, you can simplify the installation process and create a bathroom that combines style and efficiency. Whether you’re upgrading your bathroom or starting from scratch, a Casada shower drain is a reliable choice for modern and practical living.
FAQs
How do I prepare for a Casada shower floor drain installation?
Start by gathering tools and materials, clearing the shower floor, and ensuring the subfloor is stable and clean. Proper preparation simplifies the installation process.
Can I install a Casada shower drain myself?
Yes, with the right tools and instructions, DIY enthusiasts can install a Casada shower floor drain. However, consult a professional if you’re unfamiliar with plumbing work.
How do I ensure the drain is watertight?
Use plumbing tape, PVC glue, and sealant to secure the drain connections. Test for leaks at every step of the installation process.
What is the importance of waterproofing during installation?
Waterproofing prevents leaks and protects the subfloor from moisture damage, ensuring the durability and longevity of your shower floor.
Why should I choose a Casada shower floor drain?
Casada drains offer sleek designs, durable materials, and efficient drainage. They enhance the functionality and style of your bathroom.