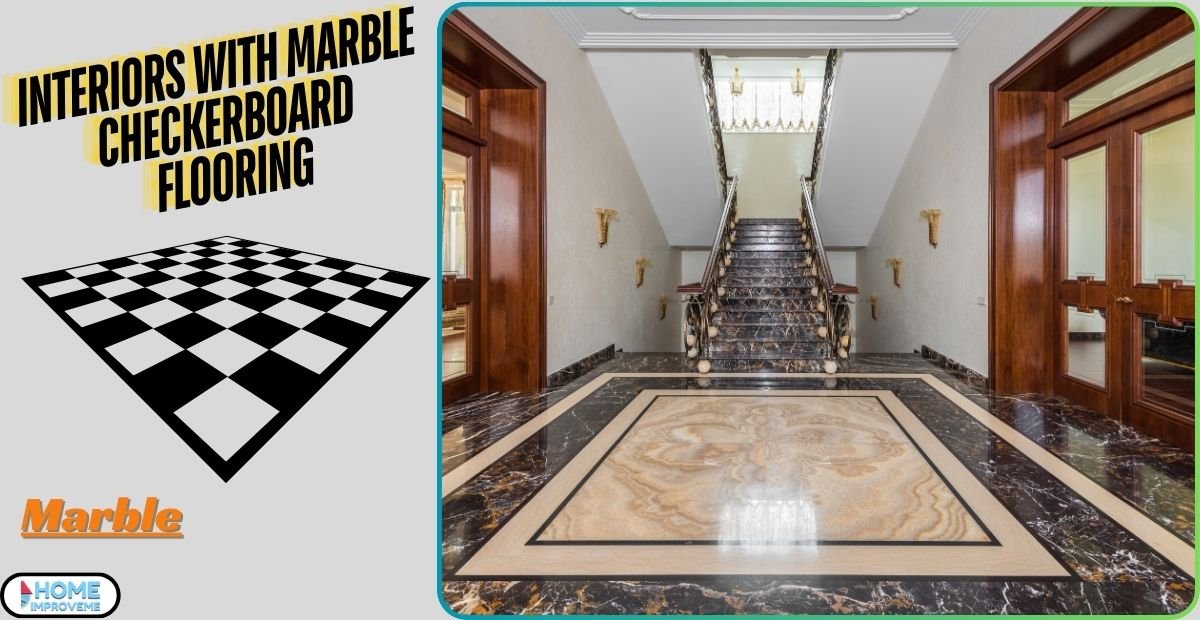
Marble checkerboard flooring is stylish and timeless and is a choice for any interior space. This striking pattern, comprising irregular light and dark marble squares, has been admired for centuries. It was a general choice in ancient Roman and Greek architecture, symbolizing elegance and luxury.
Today, this classic flooring option is experiencing a modern renaissance, bringing a touch of complexity and historical appeal to modern homes and commercial spaces.
Its aptitude to complement a variety of plan styles makes it a versatile and appealing option for those looking to improve their interiors.
What is a checkerboard flooring design? (Marble Checkerboard Flooring)
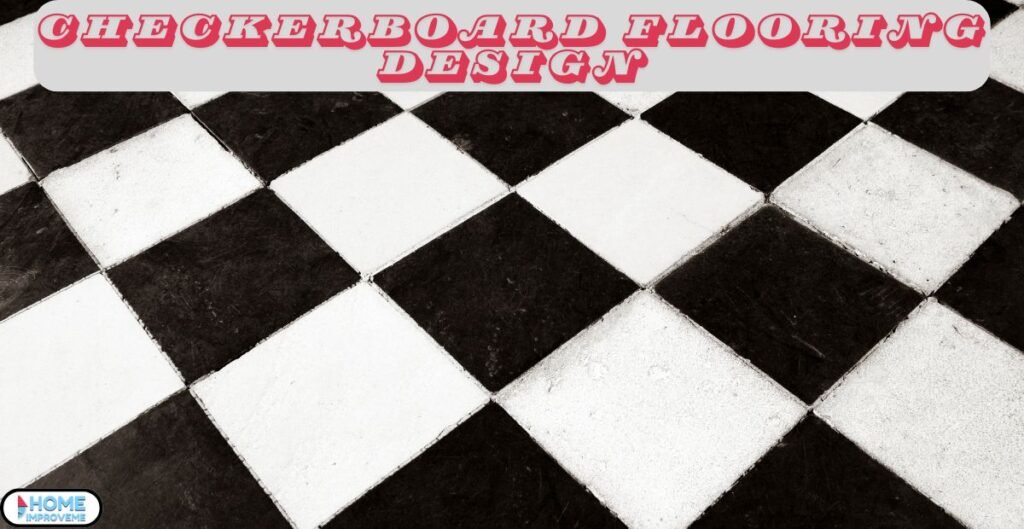
Checkerboard flooring design features a pattern of alternating squares of two dissimilar colors. Typically, these squares are laid out in a grid, creating a look similar to a checkerboard used in the game of checkers.
This plan can be created using various materials, but marble is usually selected due to its luxurious appearance. The contrasting colors, often black and white, make the pattern stand out, and it can be used to add a touch of stylishness and sophistication to any room.
Checkerboard flooring is a lovely and timeless option in kitchens, bathrooms, or hallways.
What Types of Marble Used in Checkerboard Flooring?
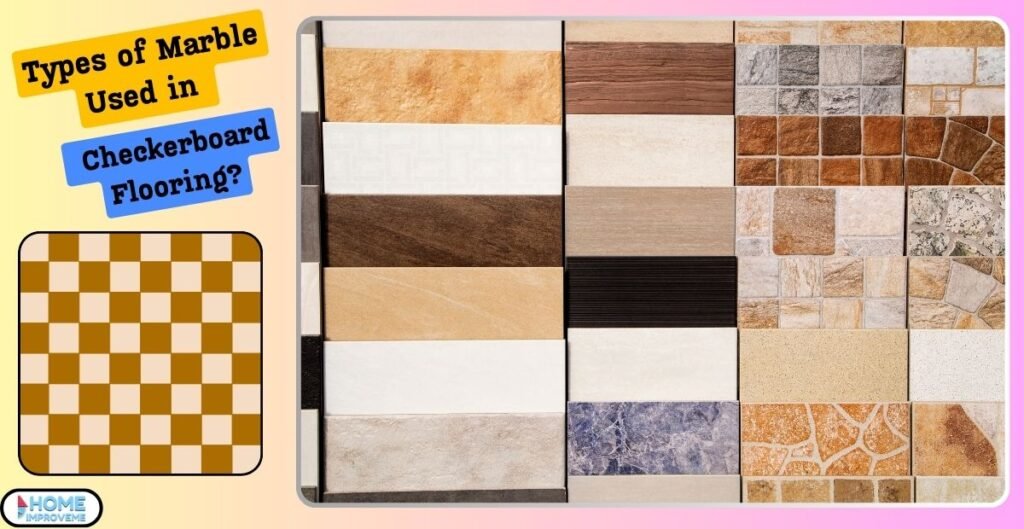
Checkerboard flooring is usually created using different minerals, each with unique features. Here are some popular marble types used in this stylish design:
- Carrara Marble
- Description: Carrara marble, created in Italy, is famous for its white-to-blue-gray background with delicate right veins.
- Characteristics: A softer marble is often selected for its definitive and subtle elegance.
- Pros: Reasonable, widely available, adds a timeless look.
- Cons: Prone to scratches and stains, needs regular keep.
- Calacatta Marble
- Description: Also hailing from Italy, Calacatta marble is known for its bold and affected veining beside a white context.
- Characteristics: It has fewer veins than Carrara, but the veins are denser and more projecting.
- Pros: Luxurious appearance, adds a striking contrast and elegance.
- Cons: Expensive, difficult to source, requires sealing and maintenance.
- Nero Marquina Marble
- Description: This marble, obtained from Spain, is black with arresting white veins running through it.
- Characteristics: It offers a high-contrast look that is perfect for checkerboard designs.
- Pros: Tough, stain-resistant, provides a bold and modern visual.
- Cons: It can be expensive, and proper care is needed to keep its shine.
- Statuario Marble
- Description: Another admired Italian marble, Statuario, is familiar for its bright white background and gray veining.
- Characteristics: Quarries are limited, making them more exclusive.
- Pros: Luxurious, suitable for unique interior spaces, adds an iconic touch.
- Cons: High price point, limited obtainability, and need for regular closing.
Each type of marble offers distinct benefits and potential drawbacks in terms of toughness, durability, and cost. When selecting marble for your checkerboard flooring, it’s vital to consider these factors to confirm that the flooring meets your style and application needs.
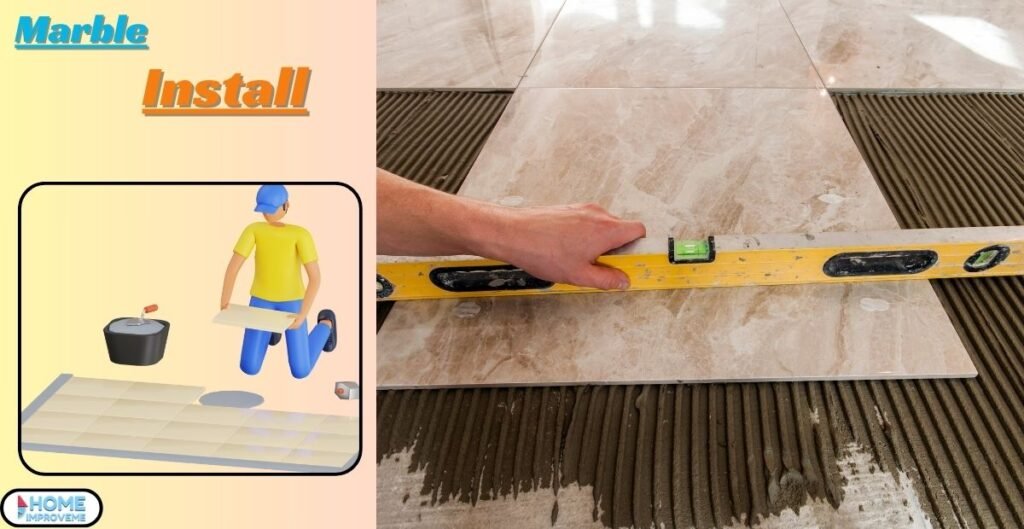
How to make a checkerboard floor?
Creating a checkerboard floor can be a simple yet satisfying DIY project with the proper training and resources. Here are some easy steps to guide you through the process:
- Choose Your Materials:
- Select two contrasting colors of marble tiles. Popular selections include black and white but feel free to select any mixture that suits your style.
- Prepare the Surface:
- Confirm the floor surface is clean, level, and dry. Remove any old parquet, nails, or debris. If the surface is rough, you may need to apply a leveling compound.
- Lay Out the Design:
- Start from the center of the room and work your way outward. Dry lay the Marble tiles in a checkerboard pattern to see how they fit and ensure the plan is symmetrical. Use insertions to keep even gaps between tiles.
- Apply Adhesive:
- Using a notched trowel, spread a thin layer of tile glue over a small sector of the floor. Press the first tile into place, starting in the center of the room. Continue placing tiles, alternating colors to create the checkerboard pattern.
- Cut Tiles as Needed:
- Use a tile reaper to trim tiles for edges and angles, confirming a perfect fit.
- Let the Adhesive Set:
- Allow the glue to dry for at least 24 hours (follow the maker’s guidelines for precise drying times).
- Apply Grout:
- Remove insertions and apply grout between the tiles using a grout float. Wipe away extra grout with a damp sponge before it desiccates.
- Seal the Tiles:
- Once the grout has cured, apply a Marble sealer to protect your tiles and keep them refined and beautiful.
Following these steps, you can create a spectacular marble checkerboard floor that adds elegance and complexity to any space.
Design Patterns and Variations
Classic Black and White Checkerboard
The typical black and white checkerboard design is eternal and elegant. This pattern consists of alternating black and white marble tiles arranged in a grid. The high difference creates a visually striking effect that draws care to the floor. It’s perfect for those who want to add a touch of complexity and drama to any room. This design works well in both old-style and modern settings.
Alternative Color Combinations
While black and white is a classic mixture, you can have fun with other color selections to suit your personal style. For example, reflect using dark blue and light grey for a more subdued look or green and white for a fresh, vibrant feel. These other color mixtures allow you to customize the checkerboard pattern to match your décor and make a unique look in your space.
Incorporating Borders and Accents
Consider joining borders and accents to add an extra layer of detail to your checkerboard floor. You can use a different color or type of marble around the edge of the room to frame the checkerboard pattern, making a finished and refined look. Accent tiles can also be placed strategically within the checkerboard design to add visual interest and break up the consistency. These variations offer creative ways to make your floor stand out and complement the overall design of your centers.
Installation Process
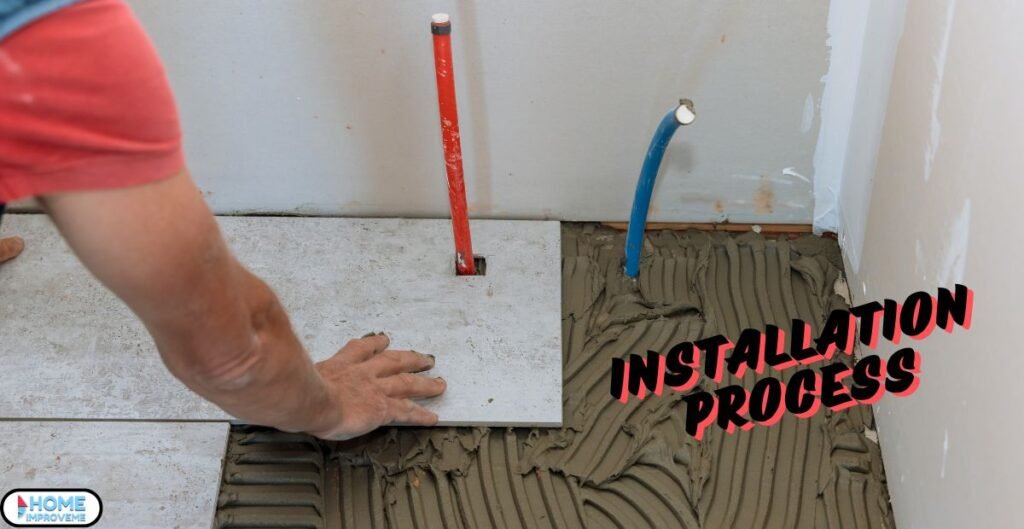
Steps Involved in Laying Out the Checkerboard Pattern
- Clean and prepare the floor: Make sure the floor is fresh, dry, and even. Remove any rubble, nails, or old parquet material.
- Measure and mark the center: Find the room’s center point by drawing two slanting lines from corner to corner. The connection is your preliminary point.
- Dry-lay the tiles: Place the tiles on the floor without glue to see how they fit. Begin from the center and move outward, confirming that the pattern is regular.
- Apply the adhesive: Use a notched trowel to spread a thin layer of tile glue on the floor. Work on a small sector at a time to prevent the glue from drying out.
- Lay the tiles: Start insertion of the tiles from the center rendering to the checkerboard pattern. Use insertions to keep even gaps between tiles.
- Cut the tiles: Use a tile reaper to trim tiles for the edges and corners, confirming they fit effortlessly.
- Let the adhesive set: Allow the glue to dry according to the maker’s guidelines, usually about 24 hours.
- Apply the grout: Remove the insertions and fill the gaps between tiles with grout using a grout float. Wipe off the extra grout with a dank sponge.
- Seal the floor: Once the grout has cured, apply a Marble sealer to defend the tiles and keep them looking refined.
Tools and Materials Needed
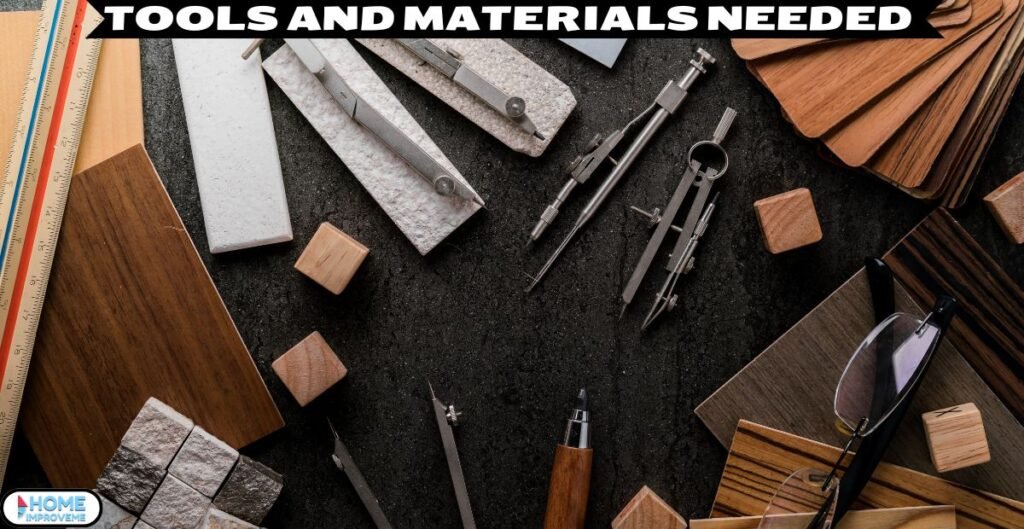
- Marble tiles in two contrasting colors
- Tile adhesive
- Notched trowel
- Tile spacers
- Tile cutter
- Grout
- Grout float
- Damp sponge
- Marble sealer
- Measuring tape
- Chalk or pencil for marking
Common Challenges and How to Address Them
- Uneven floors: Use a flattening multiple to make the floor even before the initial.
- Incorrect measurements: Double-check capacities to confirm the checkerboard pattern is centered and regular.
- Adhesive can dry too quickly. To prevent the glue from drying out, Apply glue to small sectors at a time before you lay the tiles.
- Tiles not sticking: Press the tiles firmly into the glue and twist them to confirm a good bond.
- Grout haze: To prevent a haze from starting on the tiles, wipe off extra grout directly with a damp sponge.
- Keeping lines straight: Use spacers reliably and adjust as needed to stay straightforward lines and even gaps.
Where can I Install Marble Checkered Floors in my Home?
Marble, uneven floors add a touch of elegance and complexity to almost any room in your Home. Here are some perfect places where you can install them:
- Kitchens: Marble checkered floors are a definitive choice for kitchens. They provide a durable, easy-to-fresh surface that holds up well in a high-traffic area. The checkered design can also give your kitchen a fashionable and timeless look.
- Bathrooms: Marble checkered floors benefit bathrooms due to their water-resistant properties. The contrasting tiles can improve your bathroom’s aesthetic, making it appear both luxurious and roomy.
- Entryways and Hallways: These areas often experience heavy foot traffic, so connecting marble-checkered floors here can make a grand first impression. The distinctive pattern directly draws care and sets the tone for the rest of the house.
- Living Rooms: Consider installing uneven marble floors in your living room for a sophisticated and polished appearance. This selection can elevate the overall look of the space and serve as a chat piece.
- Dining Rooms: A marble checkered floor in the dining room adds a touch of reserve and elegance, making it a perfect setting for family dinners and amusing guests.
- Home Offices: Installing a checkered Marble floor in your home office can provide an expert and stylish environment. It improves the space’s artistic while offering sturdiness.
Mixing uneven marble floors in these areas can improve your Home’s overall plan and functionality, making each space unique and visually attractive.
Conclusion
Marble checkered floors not only look beautiful but also offer practical benefits. They are rugged, easy to clean, and water-resistant, making them suitable ochraceous rooms in your Home. Thehomelegant arrival can elevate the style of any space, adding a touch of complexity and eternal charm.
Throughout the past, marble uneven floors have been used in many famous buildings and homes. For example, the Palace of Versailles in France features stunning checkered floors that stimulate awe. These floors are also typical in modern homes, adding a classy and luxurious touch to the centers.
If you want to remodel your Home, consider marble checkered floors. Their timeless beauty and realism make them a wise choice. By selecting this flooring option, you can make a stylish and useful space that stands out and excites everyone who visits.